
Image SEO: The Ultimate Guide
 Itamar Blauer10 min read
Image SEO is the process of optimising your website’s image assets to be found and interpreted by search engines correctly.
This guide will give you the exact process that I use to optimise images (without compromising on quality).
Importance of image optimisation for SEO
Image optimisation is important for SEO because it can not only help speed up your website’s load time, but can also help you appear in Google Image search, which accounts for around 10% of all Google products in terms of usage.
Websites nowadays contain various forms of multimedia on their pages to keep users engaged, and images are no exception.
Search engines like Google value fast loading websites as it is less expensive for Google to crawl these sites, therefore, making Google happy.
Images relate to this as small image files are faster to crawl, and you’re also providing a better user experience as your website loads quickly.
How to optimise images for SEO
Image SEO fundamentally involves improving the technical aspects of an image i.e. its file size and dimensions, as well as the relevancy for users and search engines.
Here is my 5-step image SEO process that will guide you through optimising your images for SEO:
#1 - Image SEO audit
Just like with any SEO strategy, you need to run an audit to identify areas of improvement with the image assets you have.
You can use different tools to perform an image SEO audit. I personally use a few tools that help with different aspects of image SEO - here is my process:
Screaming Frog
Being my go-to website crawler, Screaming Frog is great for identifying unoptimised images.
When you’ve run a crawl, select Images from the columns.
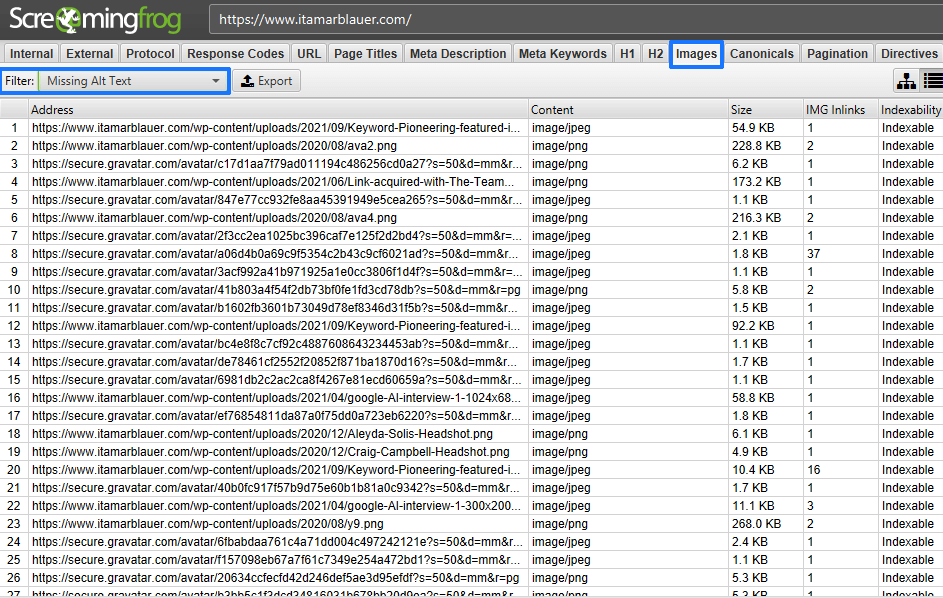
The first thing you can do is filter by images without alt text to easily gather a list of optimisation opportunities for relevancy.
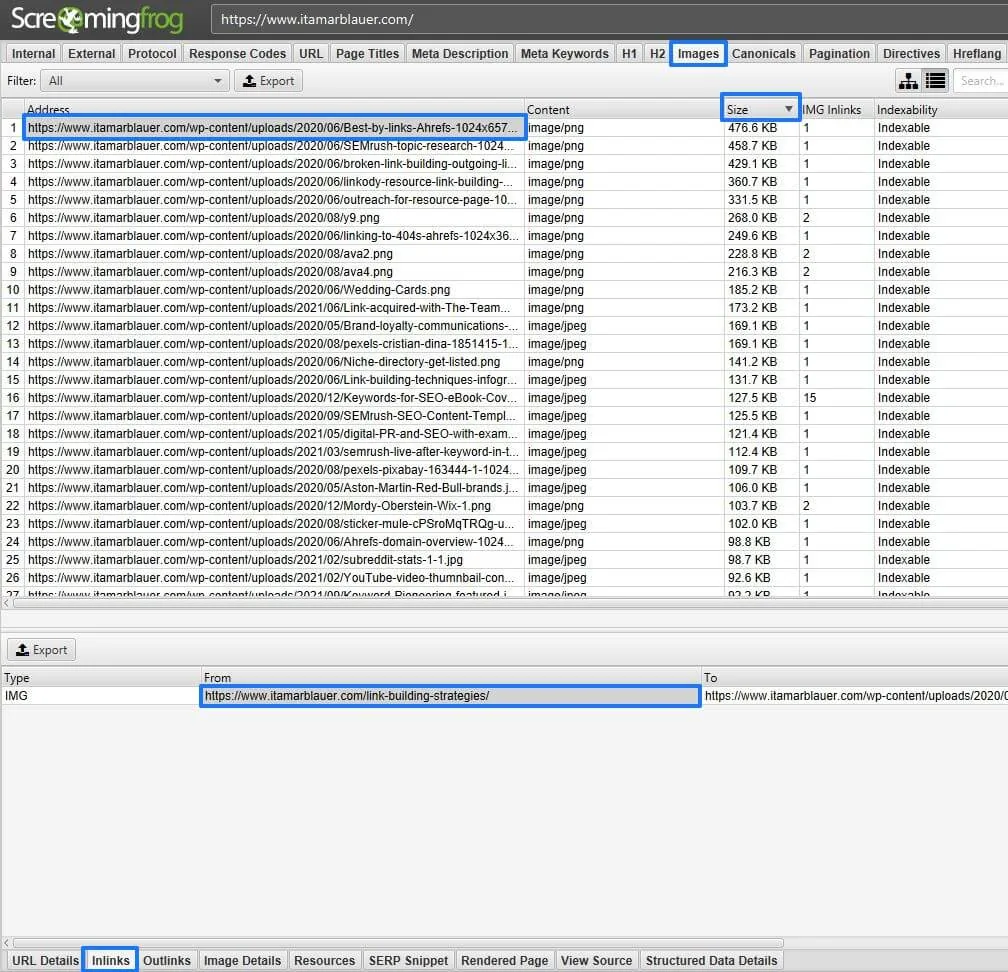
Then, you can reset the filter and click on the Size tab to find images with the biggest file sizes first.
If you click on a particular image URL, you can click on the Inlinks tab at the bottom to find where that image is being displayed.
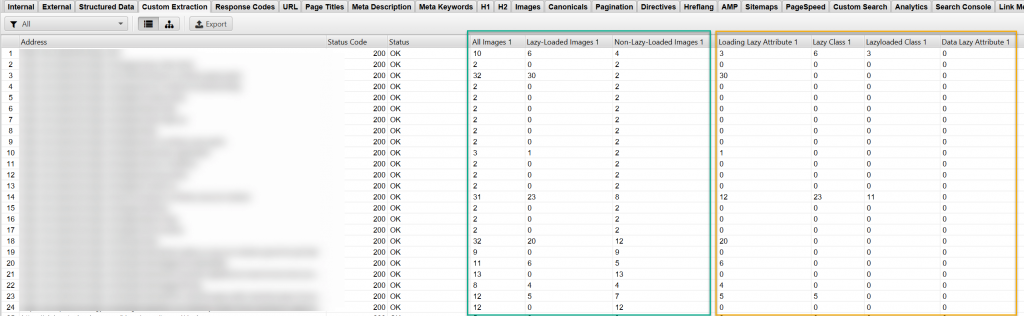
Bonus tip: If you have a paid Screaming Frog license, you can use XPath functions within your crawls to identify, for example, which images are already lazy loaded and which aren’t. It’s quite simple to do and you don’t need to be an SEO expert to try this 😉
Google Lighthouse/PageSpeed Insights
Both Lighthouse and PageSpeed Insights provide an overall audit of your page’s experience for users.
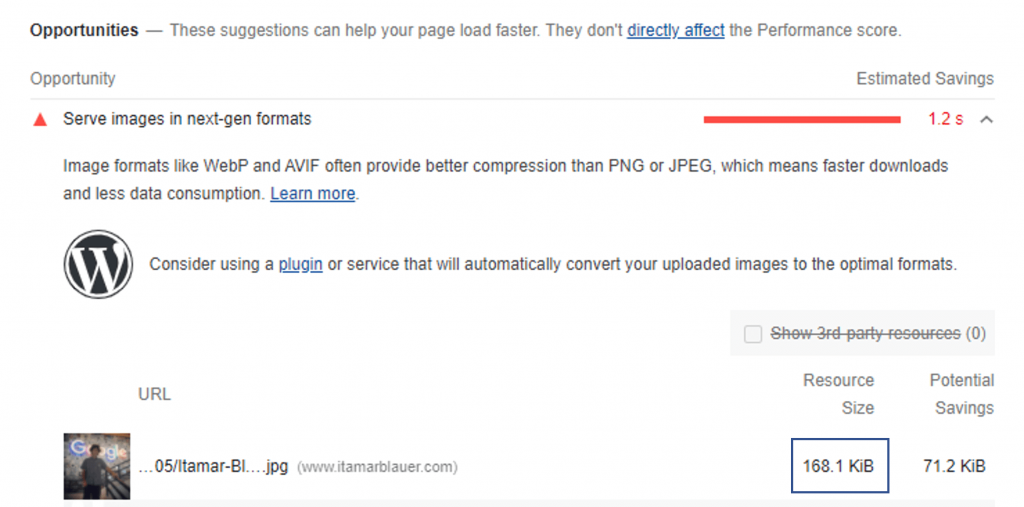
A very common opportunity related to image SEO is to serve images in next-gen formats.
If you expand that opportunity, it’ll provide a list of your images based on their size, so you get a better idea of which images you should compress.
Cloudinary’s Website Image Analysis Tool
Cloudinary provides a free tool that will analyse a URL and identify optimisation opportunities for images in terms of their file size and dimensions.
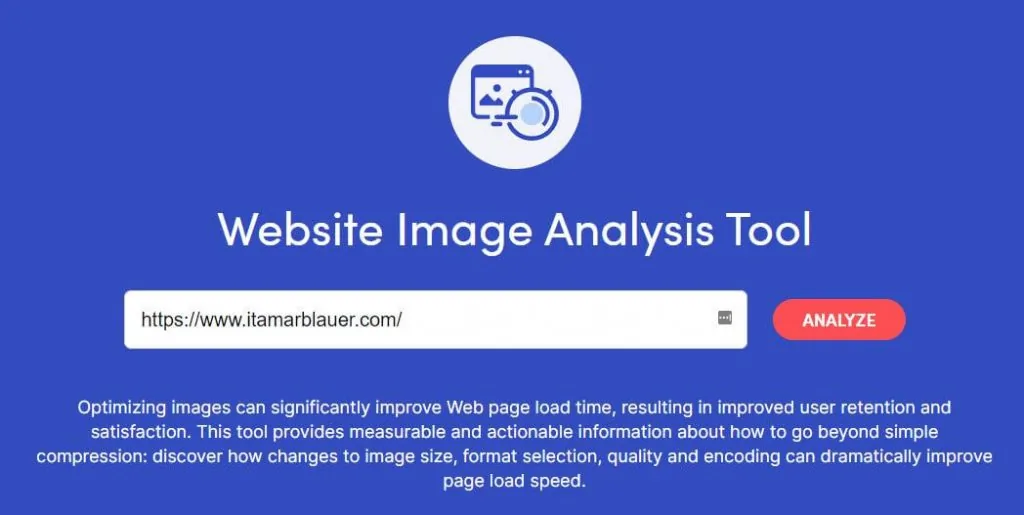
It’s the only tool I know that will find the ideal dimensions for an image based on different device types and screens.
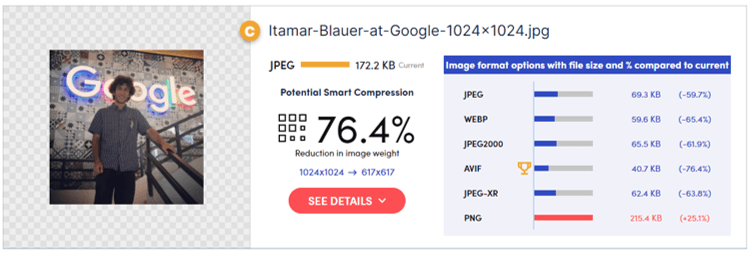
The example above is telling me that the optimal dimensions for the image is 617 x 617 pixels, whereas it is currently set at 1024 x 1024.
Note: The dimension recommendations are only shown for the page you analysed. If you have an image being used on multiple pages, it might be worth analysing each individual page as the recommended dimensions may differ.
#2 - Image resizing
If you find that an image on your site would be better optimised if it was resized, it’s time to use an image resizer tool.
My go-to tool for resizing images is BeFunky.
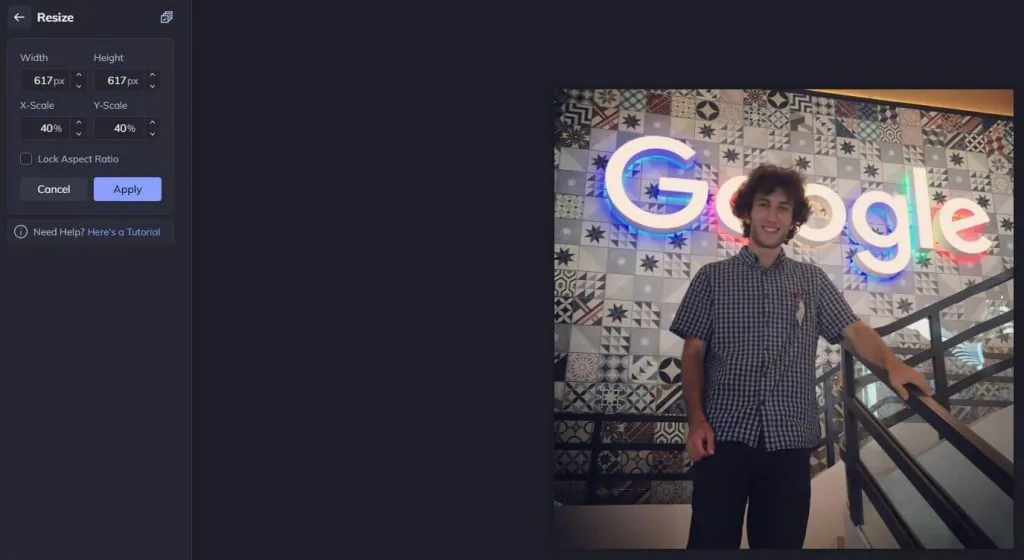
If we take the above example, the dimension recommendation from Cloudinary for the image was 617 x 617 pixels, so I would disable the Lock Aspect Ratio option and set the width and height.
Once you’ve set the right dimensions, click Apply and save the image.
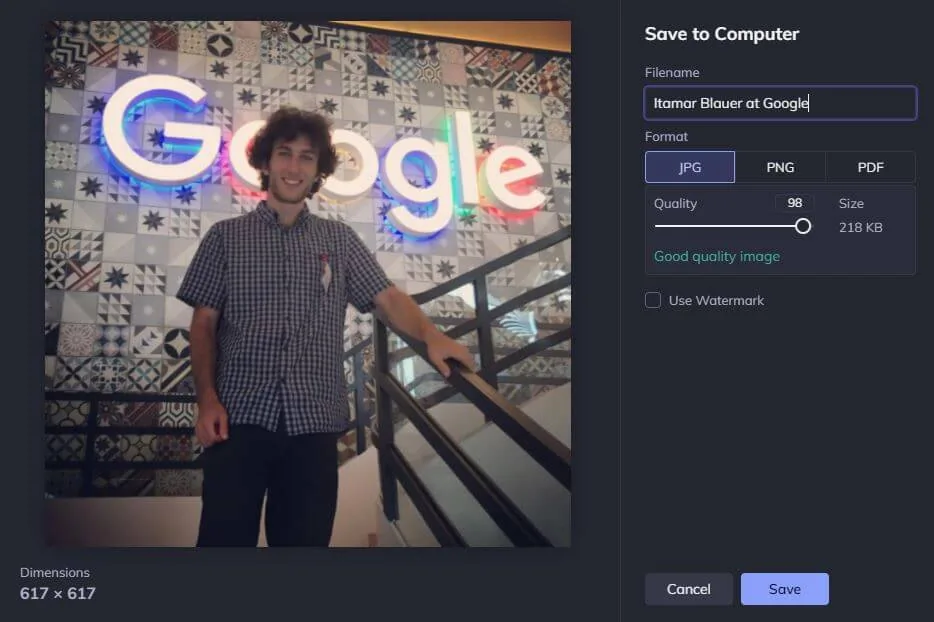
Keep the quality high and save the image as a JPG - not PNG (as PNG file sizes are typically larger). We’ll convert it to a modern format in the next step.
#3 - Image compression
Once your image is optimised in terms of its width/height and file format, it’s time for image compression.
There are different tools out there to compress images, such as the quick and simple TinyPNG.
However, if you want to have control over how much quality you want to keep from the image, use a tool like Squoosh.
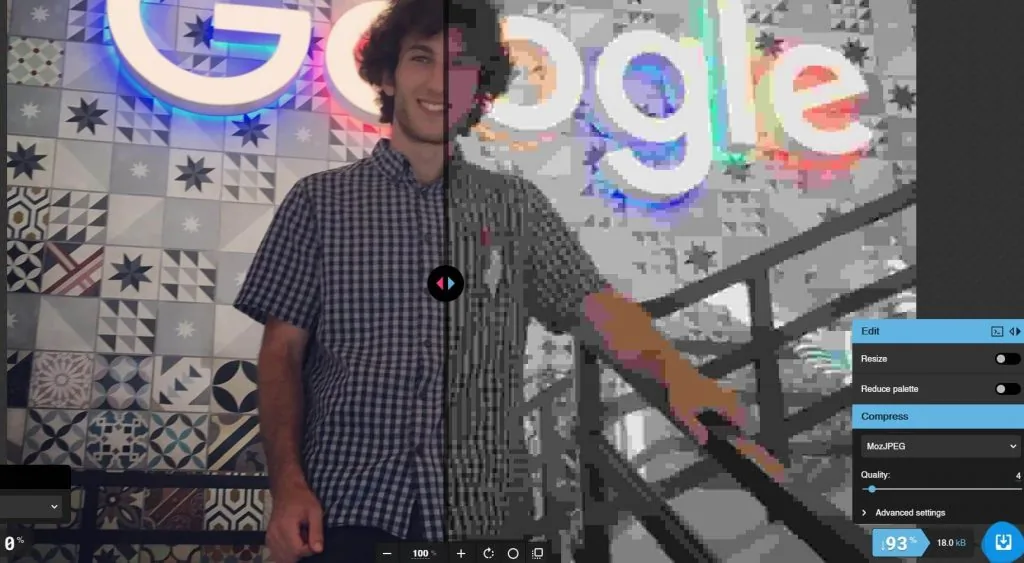
Squoosh has a slider for the quality of the image so you’re always in control over how the image will look once it’s compressed.
This is also where you should switch to a next-gen format. Remember that PageSpeed Insights recommendation from earlier? This is how you act on it: in Squoosh, choose WebP (or AVIF for even smaller files) as the output format instead of MozJPEG. Every major browser has supported WebP for years, and AVIF support is now universal too - so there’s no longer any reason to serve plain JPGs to your visitors.
In the instance above, I ended up setting the quality at 75%, which reduced the file size by more than 70% - and converting to WebP typically shaves off another chunk on top of that.
If your CMS or CDN can do this automatically (WordPress plugins, Cloudflare, and Shopify all offer auto-WebP conversion), even better - set it once and every image you upload gets served in the best format for each visitor’s browser.
#4 - Image renaming
Now it’s time to optimise the name of your image file.
The image file name should always include relevant keywords.

What you don’t want to have is an image that’s titled IMG1021.jpg - these sorts of file names don’t provide any context about the image.
#5 - Image alt text
Once you’ve resized, compressed and renamed your image, it’s time to upload it to your CMS and add an alt attribute (more commonly known as alt text).
Alt text is used to describe the contents of the image, making it easier for visually impaired users to understand what the image shows.
For image SEO purposes, the keywords you are targeting should be included within the alt text of the image (only if it makes sense).
Reason being, you want to provide as much context about your images to search engines so that they can comprehensively understand what your content is about.
It can sometimes be hard to find the right balance between providing enough context for an image based on accessibility, so here is a guide to help ensure your alt text is actually useful for users.
Optional image SEO activities
If the steps above weren’t enough for you, there are other optional image SEO activities that can be carried out (with varied use cases).
Lazy loading
Lazy loading is when you defer loading of a non-critical element until it is needed, i.e. a user reaches the element on the page.
Whilst you can use plugins to lazy load images, I prefer adding some simple code in the HTML or text editor of your image (native lazy loading is now supported by all major browsers). To do this, add loading=”lazy” to the code right after the alt attribute.
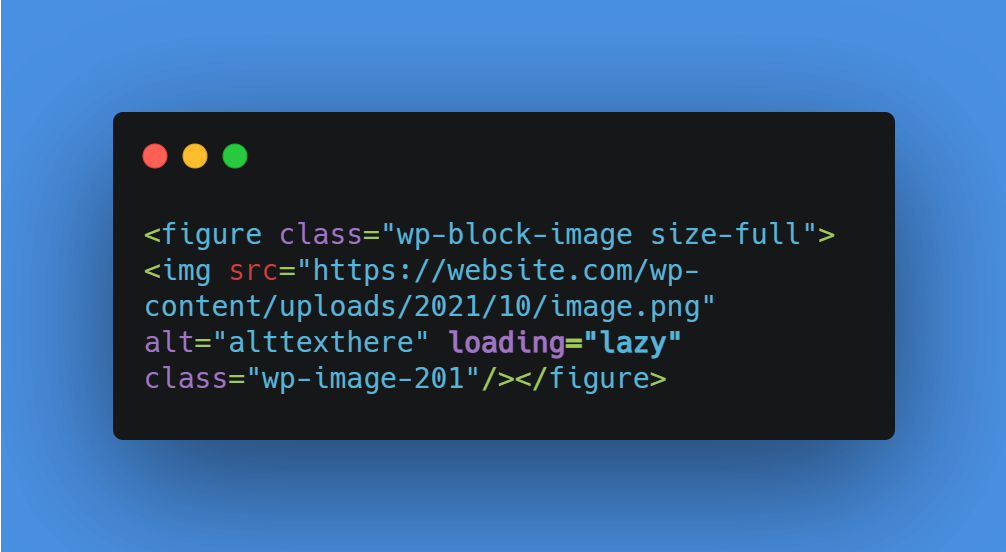
If you use Inspect Element on the image above, you can see that it is lazy loaded.
Note: Check where the elements show up first - e.g. it’s better for videos and large images to be below the fold. This can help improve your overall page speed.
CDN for images
CDN stands for content delivery network and is used to serve content from a location that is closer to the user.
If your server is located in France but you have someone in Australia accessing the content, then it will be slower as it’ll have to ping to France to get that content, whereas the CDN dynamically places that content closer to the user.

Since images can often be the largest elements within a page, it can be a good idea to have these stored within a CDN so that users can fully view the webpage in a shorter time. This can also help improve the page’s Largest Contentful Paint (LCP) metric, which is used within Core Web Vitals.
Cloudflare is arguably the most popular CDN provider that has a free plan which can be helpful for those with smaller websites or limited budget.
Image sitemaps
An image sitemap is a collection of your website’s images stored in an XML file. These files are useful to search engines as they can easily access all of the images you use on your website, and are especially helpful if you are aiming to attract site visitors through Google Images.
With Screaming Frog you can generate an image sitemap with different configurations, but there are also browser-based alternatives.
Once you’ve generated your image sitemap, you need to upload the sitemap to your domain’s root folder through using an FTP (which is used to upload files to a website).
Now that you have the image sitemap uploaded on your website, you can submit it within Google Search Console by navigating to Index → Sitemaps and entering the sitemap URL.
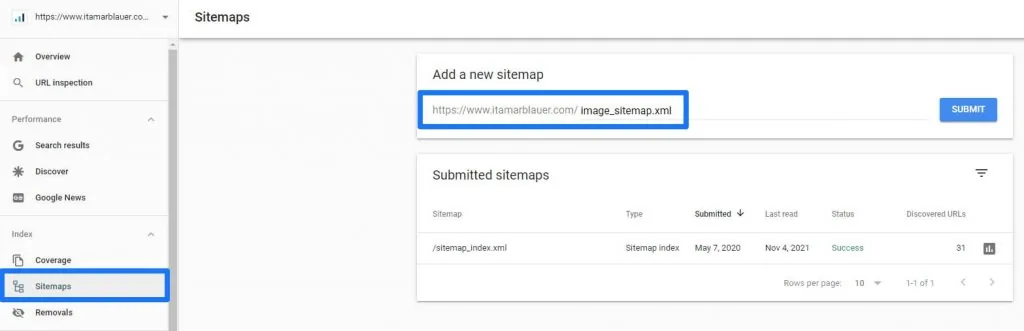
Image redirects in a site migration
In many cases during a site migration, images can be forgotten, and as such, they will return 404s as the old image URLs aren’t updated to the new URL.
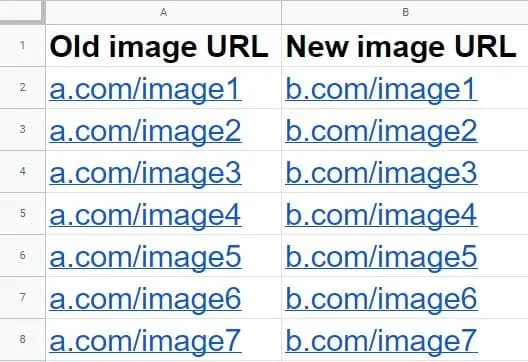
If you are migrating to a new domain, you’ll need to create a redirect map to ensure the new location for the images have redirects in place so they will return a 200 status code.
You can manually create a redirect map in Excel by listing out the image URLs and using the replace function or the concatenate formula (depending on your situation).
When this step is completed, push the redirects live through the .htaccess file or the means of your hosting provider and check that they work.
Once your image redirects are in place, you can upload the old image sitemap to force Google to re-crawl and discover the new image URL location (as instructed via the redirects).
Using SEO tools for image optimisation
There are various SEO tools that help with image SEO, from crawlers to add-ons or plugins on your website that automatically compress images.
Crawlers are helpful to give you a focused look at all of your website’s images, filtered by the file size, or highlighting which ones do not have alt text set.
It’s worth noting that you can manually optimise images on your website, but if you’re dealing with a large website that has thousands or more unoptimised images, it may be worth using an image SEO tool to help you out.
Conclusion
When it comes to optimising your page speed, images are often the only assets that a webmaster would have control over without any developer assistance that you would need for other more code-heavy optimisations.
Images are often overlooked and can be an integral part of an SEO strategy, so getting these right can improve your site’s performance and visibility.
As always, if you’re struggling with your image SEO strategy, reach out to an SEO consultant.